Welcome

We are committed to processing and printing of B&W film, we bring reliability, quality and affordability to film processing. Due to the gradual decline in film and advances in digital photography in Kuala Lumpur and around Malaysia, many laboratories have now ceased providing a B&W service but we believe there is still a place for quality processed and printed B&W film. We strongly support the Film Revival Project.


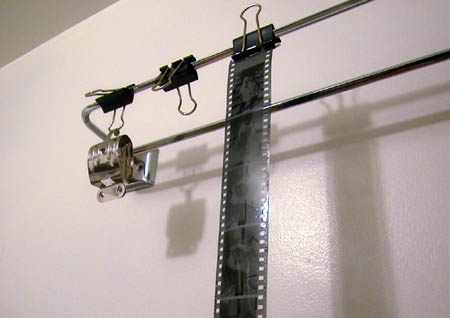
We have a small team of technicians dedicated to producing consistent quality results.

Using high quality Epson & Nikon scanning equipment, we can convert your black & white films to digital files for you to use on your own computer.

Services & Price List

Black and white films are processed to the highest standards by trained technicians who monitor process control in-house to maintain quality and reliability.

* Please ensure that the film emulsion type is clearly visible.
* Films cut and returned in plastic sleeves.

B&W Film Development
Film
Regular
7 day service
Express
2 day service
35mm / 120 roll
.RM15
.RM20


Push/Pull request additional RM3


E6 Slide Film Development
Film
Regular
7 day service
Express
2 day service
35mm / 120 roll
.RM30
.RM42

Scanning Services


Professional Quality Scanning

High Resolution  (1200dpi)  Digital Scan
Film
Price
35mm / 120 roll
RM20


Film
Item
Price
35mm Ilford FP4 ISO125
RM28/roll

Chemicals & Equipment
Item
Price
FRP Developer 
Working Solution (500ml)
(Enough for 6 rolls 35mm)
RM12/bottle
FRP Stop Bath 
Working Solution (500ml)
(Enough for 6 rolls 35mm)
RM6/bottle
FRP Fixer 
Working Solution  (500ml)
(Enough for 6 rolls 35mm)
RM6/bottle


FRP Development KIT. 
(Developer/Stop Bath/Fixer Package) 500ml Working Solution 
(Enough for 6 rolls 35mm)
RM20/package


Film Changing Bag
RM110/set
Thermometer
RM18/pcs
Funnel
RM5/pcs


Digital Timer
RM10/pcs
Paterson 1 Reel Development Tank
RM160/set


Coffee Table Photobook
Send us 32 of your favorite photos and we can print a beautifully custom ring bound table booklet for your enjoyment. Perfect for weddings, presents, travel photos, family photos, friends, parties. 
Different sizes available starting from RM38


Canvas Frame Print
Canvas Size
Measurement (inch)
Measurement (cm)
Price (RM)
Example
SQ1
12 x 12"
30 x 30 cm
RM 50.00 
SQ2
16 x 16"
41 x 41 cm
RM90
SQ3
20 x 20"
51 x 51 cm
RM130
SQ4
24 x 24"
61 x 61 cm
RM180
SQ5
28 x 28"
71 x 71 cm
RM220
SQ6
32 x 32"
81 x 81 cm
RM220
SQ7
36 x 36"
91 x 91 cm
RM350
SQ8
42 x 42"
106 x 106 cm
RM450
RT1
10 x 15"
26 x 38 cm
RM60
RT2
12 x 18"
30 x 46 cm
RM80
RT3
16 x 24"
41 x 61 cm
RM130
RT4
20 x 30"
51 x 76 cm
RM185
RT5
24 x 36"
61 x 91 cm
RM230
RT6
28 x 42"
71 x 106 cm
RM300
RT7
32 x 48"
81 x 121 cm
RM380
RT8
36 x 54"
91 x 137 cm
RM440
RT9
40 x 60"
101 x 152 cm
RM500
RT10
42 x 63"
106 x 160 cm
RM550
PANO1
12 x 36"
30 x 91 cm
RM150
PANO2
16 x 48"
41 x 121 cm
RM230
PANO3
20 x 60"
51 x 152 cm
RM330
PANO4
24 x 72"
61 x 182 cm
RM450


by Film Revival Project, Black & White Film Processing Malaysia

Contact

Address 
No.6 Jalan Solaris 4
Solaris Mont Kiara
Tel:  03 62040308
H/P: 012 306 8982 

Email: bwfilmprocessing@gmail.com

Open 8AM - 8PM, Monday - Saturday

Our Film Revival Project Processing centre is conveniently located within Solaris, Mont Kiara at No.6 Jalan Solaris 4. Directly across from Canton Fare, 2 doors before the Departure Lounge.


View Larger Map

by Film Revival Project, Black and White Film Processing Malaysia

Samples

As photo enthusiast ourselves we take lots of photos! These B&W photos are taken by use with our various classic cameras using Ilford PANF  & Kodak T-Max 100 Film. Developed Using Our F.R.P 3 step Developing Solution Kit. Our carefully controlled process ensures consistently good results. 

Taken with Kershaw 630, 6x6
English Camera circa 1955 with German lens (Possibly Zeiss Anastigmat)

Taken with Kershaw 630,6x6

Taken with Kershaw 630, 6x6

Taken with Olympus Trip 35, 35mm
Amazingly good classic point and shoot camera with a very sharp f2.8 Zuiko lens

Taken with Rollei 35S, 35mm
Collectible compact camera, full manual, sharp Zeiss Sonnar 40mm f2.8 lens

Taken with Olympus PEN EE2 Half frame, 72 frame in a 35mm roll
Beautifully elegant compact camera from the 60's.  Sharp 28mm  f3.5 Zuiko lens

Taken with Hasselblad 503CW 80mm Zeiss Planar Lens

Taken with Pentax 645N 45-85mm AF Zoom
Before the days of EXIF files the film settings are printed on the bottom of film.


by Film Revival Project, Black and White Film Processing Malaysia

Useful Links

Photo Filters for Black and White Photography


 Red filter
Harsh reproduction, intense color deviation, strong cloud formation, good rendering of distance, even with haze.
 Orange filter
Similar effect as red filter, but not such harsh contrast and fewer color deviation effects.
Yellow filter
Functions without color deviation.
Green filter
Best for landscapes with a lot of forest and meadows. Creates a contrast between different shades of green.
Blue filter
Intenifies haze, reduces contrast, produces a mist effect, obscures the distance.
Black and White Film Processing, Film Revival Project

Sale: Film Tested Cameras

We feature only highly collectible classic cameras which are personally fully film tested.  We ensure the lenses are clear and clean. We also test and check the shutter, aperture, timers, counters, light seals, winding mechanism and flash.

  • Olympus Pen EE Half Frame Camera (Collectible)
  • Lens: Clear, No fungus, No  scratches
  • CLA, Film Tested
  • Real leather strap
  • PRICE : RM550
......................................................................................................................
  • Olympus Pen EES Half Frame Camera (Collectible)
  • Len: Clear, No fungus, No  scratches
  • Zone Focusing Lens
  • CLA, Film Tested
  • PRICE : RM500
......................................................................................................................
  • Olympus TRIP 35
  • Excellent Condition 
  • Lens: Clear, No fungus, No  scratches
  • Zone Focusing Lens
  • CLA, Film Tested
  • PRICE : RM400
......................................................................................................................


  • Olympus TRIP 35
  • Lens: Clear, No fungus, No scratches
  • Zone Focusing Lens
  • CLA, Film Tested
  • PRICE : RM400

  • ......................................................................................................................


  • Olympus TRIP 35
  • Mint Condition 
  • Lens: Clear, No fungus, No scratches
  • Zone Focusing Lens
  • Brand New blue custom leather covering
  • CLA, Film Tested
  • PRICE : RM550

  • ......................................................................................................................


  • Zeiss Ikon Nettar 6x6  (Collectible)
  • Mint Condition, Highly collectible
  • Lens: Clear, No fungus, No scratches
  • Zone Focusing Lens, 
  • Very sharp Novar Anastigmat Lens 75mm f6.3
  • Vario Shutter B, 1/25, 1/75 & 1/200 Shutter speed
  • CLA, Film Tested
  • PRICE : RM580
  • ......................................................................................................................
  • Zorki C Rangefinder (s/n: 56119684)
  • Leica IIIf copy
  • Lens: Clear, No fungus, No scratches
  • f3.5 50mm lens
  • Very sharp Novar Anastigmat Lens 75mm f6.3
  • Film Tested
  • PRICE : RM450

  • ......................................................................................................................

    Developing B&W Film


    1. Load Film into developing bag.
    i) Put exposed film, development tank, scissors & bottle opener into changing bag.
    ii) slip hands into changing bag
    iii) Open film canister with bottle opener
    iv) Cut film header
    v) Load film into developing reel.
    vi) Load developing reel into developing tank
    vi) Close light seal cover

    You can now safely remove the developing tank from the bag.

    The following posting does a great job of explaining the detailed steps in photos.
    How to Load Film into Developing Tank

    Here's another good guide with lots of illustrative photos
    Loading The Film/


    2. Stabilised the developer temperature to 20 Celsius. 
    (with the exception of Lucky 100 film - 23 Celsius)
    i) Open the cap for the Developer (RED label bottle marked as STEP #1)
    ii) Insert thermometer into developer bottle opening
    iii) Immerse developer bottle into a bucket of ice water
    iv) Note temperature, once the developer temperature is at 20C, bring developer solution out and start developing!

    4. Refer to development chart. Lookup you film type and ISO and note corresponding developing time (typically between 7 - 12mins).
    Film
    ASA/ISO
    Developing Time (mins)
    APX 100
    100
    9
    Delta 100 Pro
    50
    5.5
    Delta 100 Pro
    100
    7
    Delta 400 Pro
    200
    8.5
    Delta 400 Pro
    400
    11.5
    Delta 400 Pro
    800
    17
    FP4+
    50
    8
    FP4+
    125
    12
    HP5+
    400
    9
    Ilford Pan 400
    200
    7
    Ilford Pan 400
    400
    9
    Neopan 100 Acros
    80
    7
    Neopan 100 Acros
    100

    Neopan 400
    400
    8
    Pan F+
    50
    5.5
    Plus-X
    100
    9
    SFX 200
    200
    11
    Shanghai GP3 Pan 100
    100
    11
    TMax 100
    100
    11
    TMax 400
    400
    9

    Film
    ISO
    Dev Time
    (Mins)
    Temp
    Lucky 100
    100
    7.5
    23C
    Lucky 400
    400
    6.5
    20C


    4. Pour DEVELOPER (RED label bottle marked as STEP #1)  into developing tank and agitate for the prescribed duration.
    Here's a good demonstration agitation on Youtube: Developing Tank Agitation Technique
    Agitation:  standard technique of 30 seconds continuous agitation after immersion, followed by 5 tank inversions per minute.
    Once the prescribed developing time has been met, pour the developer solution back into the development bottle using a funnel.

    5. Pour STOP BATH (YELLOW label bottle marked as STEP #2) into developing tank and agitate for the 30 secs 
    Once the prescribed Stop Bath time has been met, pour the Stop Bath solution back into the Stop Bath bottle using a funnel.

    6. Rinse developing tank with clear water once.

    7. Pour FIXER (GREEN label bottle marked as STEP #3) into developing tank and agitate for 8 mins
    Once the fixer has been pour into the developing tank, it is safe expose the film to observe the degree of development, if the clear part of the film still looks cloudy after 8 mins, put the film back into the fixer to extend the fixing process.
    Once complete, pour the Fixer solution back into the Fixer bottle using a funnel.

    8. Wash the film in clean running water for 15 mins


    9. Wash film with diluted washing up detergent

    10. Hang film to dry.
    How to Wash & Dry Film


    by Film Revival Project, Black and White Film Processing Malaysia