
1. Load Film into developing bag.
i) Put exposed film, development tank, scissors & bottle opener into changing bag.
ii) slip hands into changing bag
iii) Open film canister with bottle opener
iv) Cut film header
v) Load film into developing reel.
vi) Load developing reel into developing tank
vi) Close light seal cover
You can now safely remove the developing tank from the bag.
The following posting does a great job of explaining the detailed steps in photos.
How to Load Film into Developing Tank
Here's another good guide with lots of illustrative photos
Loading The Film/
2. Stabilised the developer temperature to 20 Celsius.
(with the exception of Lucky 100 film - 23 Celsius)
i) Open the cap for the Developer (RED label bottle marked as STEP #1)
ii) Insert thermometer into developer bottle opening
iii) Immerse developer bottle into a bucket of ice water
iv) Note temperature, once the developer temperature is at 20C, bring developer solution out and start developing!
4. Refer to development chart. Lookup you film type and ISO and note corresponding developing time (typically between 7 - 12mins).
Film
|
ASA/ISO
|
Developing Time (mins)
|
APX 100
|
100
|
9
|
Delta 100 Pro
|
50
|
5.5
|
Delta 100 Pro
|
100
|
7
|
Delta 400 Pro
|
200
|
8.5
|
Delta 400 Pro
|
400
|
11.5
|
Delta 400 Pro
|
800
|
17
|
FP4+
|
50
|
8
|
FP4+
|
125
|
12
|
HP5+
|
400
|
9
|
Ilford Pan 400
|
200
|
7
|
Ilford Pan 400
|
400
|
9
|
Neopan 100 Acros
|
80
|
7
|
Neopan 100 Acros
|
100
|
|
Neopan 400
|
400
|
8
|
Pan F+
|
50
|
5.5
|
Plus-X
|
100
|
9
|
SFX 200
|
200
|
11
|
Shanghai GP3 Pan 100
|
100
|
11
|
TMax 100
|
100
|
11
|
TMax 400
|
400
|
9
|
Film
|
ISO
|
Dev Time
(Mins) |
Temp
|
Lucky
100
|
100
|
7.5
|
23C
|
Lucky 400
|
400
|
6.5
|
20C
|
4. Pour DEVELOPER (RED label bottle marked as STEP #1) into developing tank and agitate for the prescribed duration.
Here's a good demonstration agitation on Youtube: Developing Tank Agitation Technique
Agitation: standard technique of 30 seconds continuous agitation after immersion, followed by 5 tank inversions per minute.
Once the prescribed developing time has been met, pour the developer solution back into the development bottle using a funnel.
5. Pour STOP BATH (YELLOW label bottle marked as STEP #2) into developing tank and agitate for the 30 secs
Once the prescribed Stop Bath time has been met, pour the Stop Bath solution back into the Stop Bath bottle using a funnel.
6. Rinse developing tank with clear water once.
7. Pour FIXER (GREEN label bottle marked as STEP #3) into developing tank and agitate for 8 mins
Once the fixer has been pour into the developing tank, it is safe expose the film to observe the degree of development, if the clear part of the film still looks cloudy after 8 mins, put the film back into the fixer to extend the fixing process.
Once complete, pour the Fixer solution back into the Fixer bottle using a funnel.
8. Wash the film in clean running water for 15 mins

9. Wash film with diluted washing up detergent
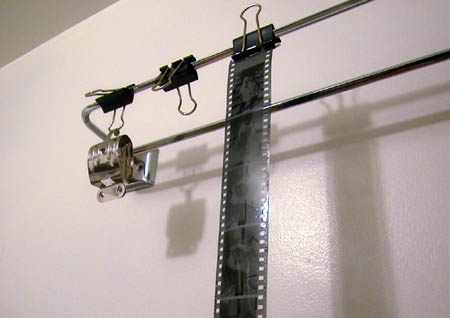
10. Hang film to dry.
How to Wash & Dry Film
by Film Revival Project, Black and White Film Processing Malaysia